

A Virtual Private Network allows you to hide your online activities, gain access to content blocked in your country, and remain safe and secure online. We are going to show you how to install PrivateVPN in our complete tutorial. In just 5 easy steps, you will have installed the software on your computer and be up and running.
This VPN provider is well worth considering due to the huge number of features offered in its packages. This includes military-grade encryption, rapid connection, unlimited speed, unlimited bandwidth, and zero data logging.
The following steps will guide you through the process:
- Choosing your plan;
- Creating your account;
- Downloading;
- Installing;
- Running the software.
How to Set Up PrivateVPN
Now onto the five easy steps showing you how to install PrivateVPN and get up and running behind a Virtual Private Network.
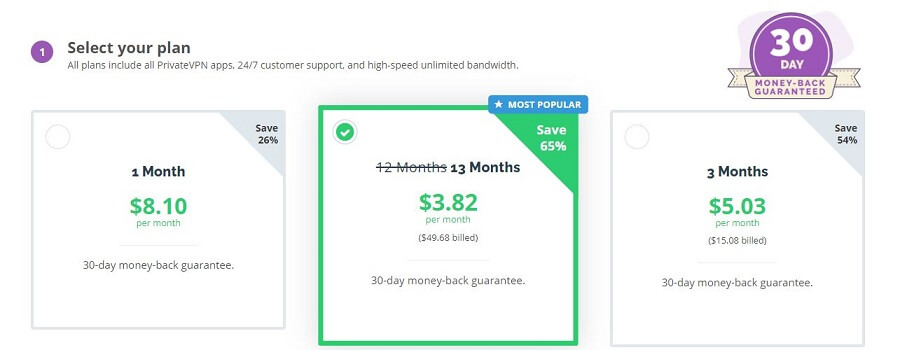
1. Choose Your Plan
The first step is to navigate to the website of the VPN provider and decide which plan is the most suitable for you. Bear in mind that all plans come with a 30-day risk-free trial. The longer you subscribe the cheaper the subscription.
2. Set Up an Account
Step two of our guide on how to set up PrivateVPN is to set up an account. This requires an email address and a password, as well as choosing a preferred payment service. Once your payment has gone through, you will receive confirmation and get a link to download the software.
3. Download
Go to the download page by clicking on the link given and choose the correct installation for your system (Windows, Mac, etc). Download the installation package to your computer and wait for the download to complete.
4. How to Install PrivateVPN Software?
Find the software you just downloaded onto your computer and click on it to begin the installation. Read the terms and conditions and tick that you agree to the terms and conditions then click on the “Install” button.
If you are installing on Windows PC, a security box will pop up asking if you wish to move forward and install the “TAP-Windows adapter”, so go ahead and install it.
5. Run the Software on your Computer
The final step in our how to set up PrivateVPN guide is to run the software you just installed on your computer, so look in the “Start” menu or “Programs” to find the PrivateVPN software icon and click on it.
The software will open and ask you for the username and password you used when you set up your account. Type this in and click on “Remember me” so that the software remembers your details.
You can then click on “Log in”. All you need to hide your true IP address behind that of one of the servers of the VPN provider is to choose a server location and click “Connect”. The software will tell you the country of the server you are connected to and the IP address.
If you have followed our guide on how to install PrivateVPN step by step, you should now be up, running, and safe behind a Virtual Private Network. You are now free to browse the internet away from prying eyes, including hackers and your internet service provider.

A professional writer with a Master’s degree in Mechanical Engineering. Since his youngest age, he loves everything related to internet, technology, fitness, games, and dogs! He joined our team in order to bring his deep knowledge in security services, among which VPN is of course a key component.